In today’s digital market, having a reliable and secure mail server is very important for any small business, large enterprise or even just for individuals who want private email solutions. Similarly, if you are tired of unreliable old-school email services that have limited storage and bunch of irrelevant ads, then a self-hosted email server is final solution. Your own SMTP Mail Server will offer more control, privacy and customization that third-party services can’t match.
We will walkthrough by setting up Mailcow which is powerful and open-source mail server compatible with CloudPanel which itself, is a user-friendly web hosting control panel running on Ubuntu 20.04 (or later). Even with no prior experience, you will be sending and receiving emails from your own domain in no time. By the end of this article, anyone who followed upon this guide will have a fully functional mail server.
What Do We Need Before Installing Custom Mail Server?
very good dish requires some decent ingredients, and setting up your own email server is no different! To get started, you’ll need these key elements:
1. CloudPanel:
This is the foundation of your email server, acting as your kitchen. CloudPanel is a user-friendly web hosting control panel that simplifies server management for Ubuntu. If you don’t already have CloudPanel installed, head over to their official documentation for step-by-step instructions: CloudPanel Installation Guide
2. VPS Server with Ubuntu
To run a mail server efficiently, your VPS should meet the following minimum requirements
These specifications ensure that your server can handle the mail server’s load without performance issues. But another hurdle is the knowledge of service provider that you are using, here is basic summary:
| DigitalOcean | Known for its simplicity and scalability. |
| AWS | Offers a wide range of services and high availability. |
| Linode | Cost-effective with good performance |
| Vultr | Offers a balance between cost and performance. |
| Hostinger | Cheaper but Performance is good (Hostinger is used in this guide) |
If You are new to VPS Hosting then Here’s the Complete Guide that will clear all your doubts: What is a VPS and How It Helps?
Note: CloudPanel Installation For VPS Hosting from Hostinger
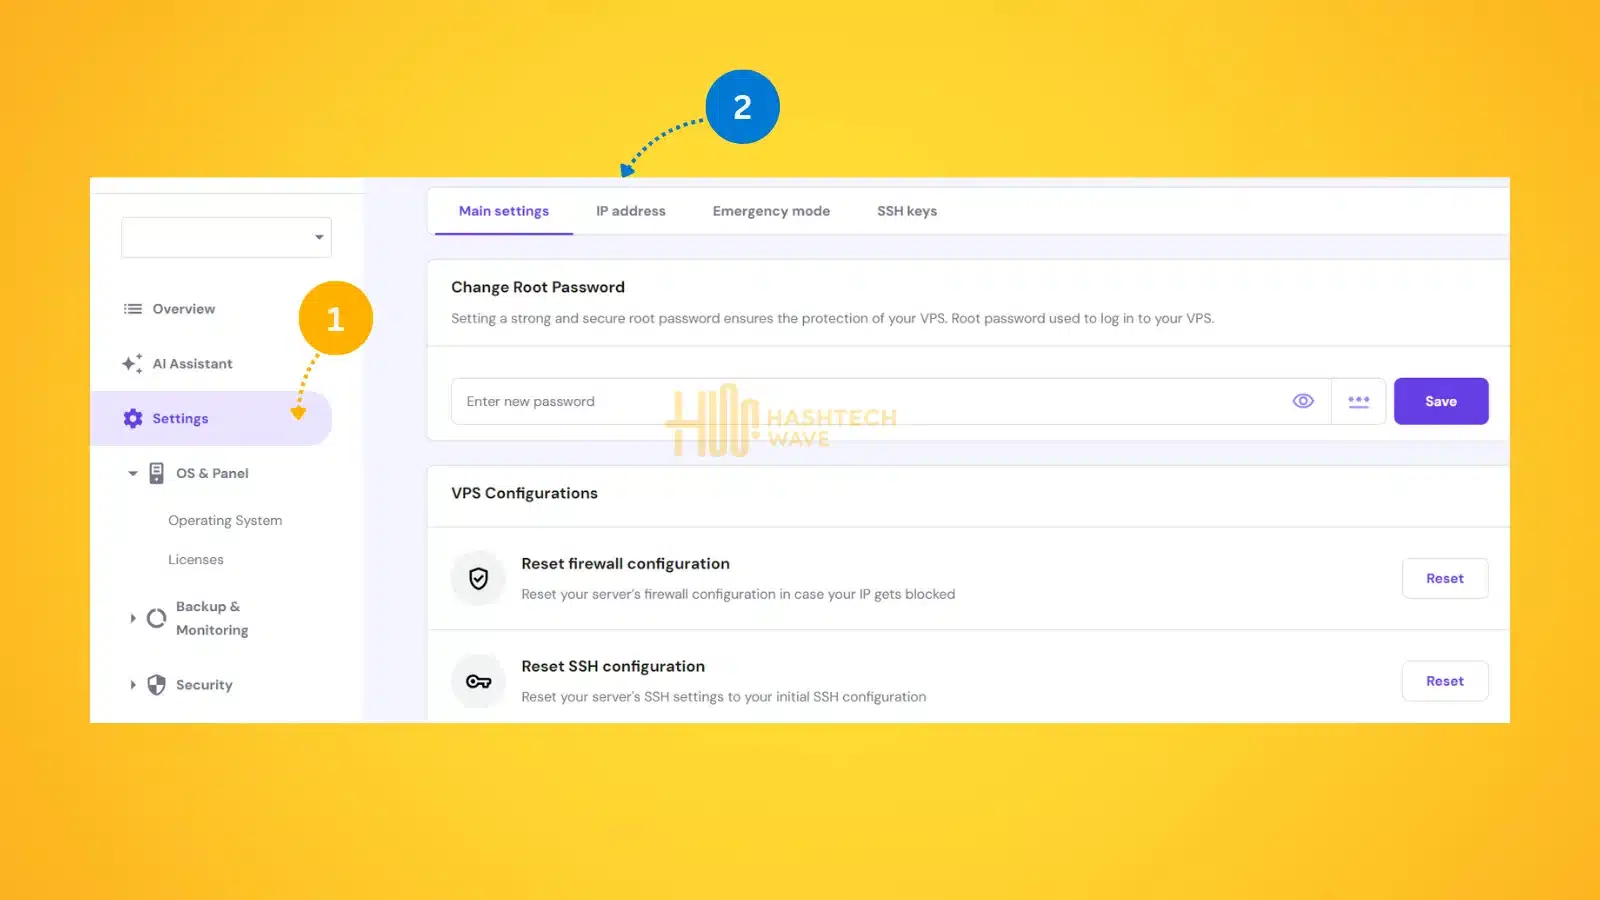
You can navigate to your VPS Manager > Settings > OS & Panel. From there, select OS with Panel and Select CloudPanel with Ubuntu
Buy Hostinger VPS Plan & Get Discount 20% with Best Performance at Cheaper rates
3. DNS Configuration and Reverse DNS
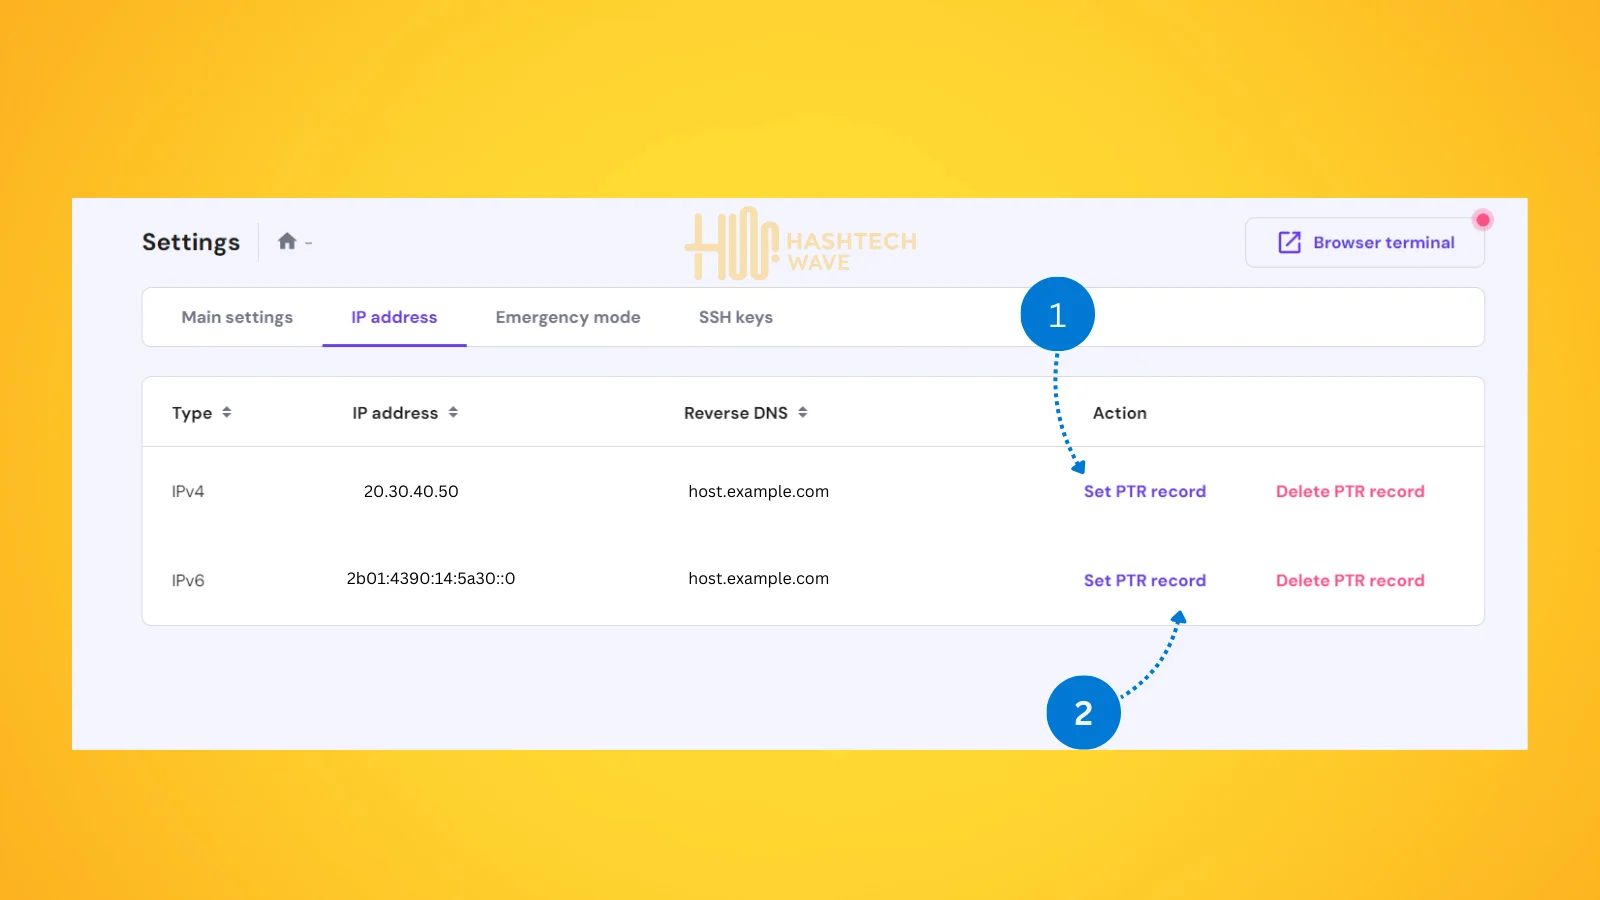
It is highly recommended to make sure Pointer (PTR) record of your VPS Server IP Address matches the Fully Qualified Domain Name (FQDN) for mailcow host. This is set usually at VPS settings provided by vps hosting provider that you leased the IP Address from. For Hostinger here is the method and almost it is same for other hosting providers as well:

Process is similar on almost every hostinger provider and as shown in figure where Hostinger VPS is configured to change it’s PTR Record for Reverse DNS.

Ready to Get Cooking? Installing MailCow Mail Server on CloudPanel
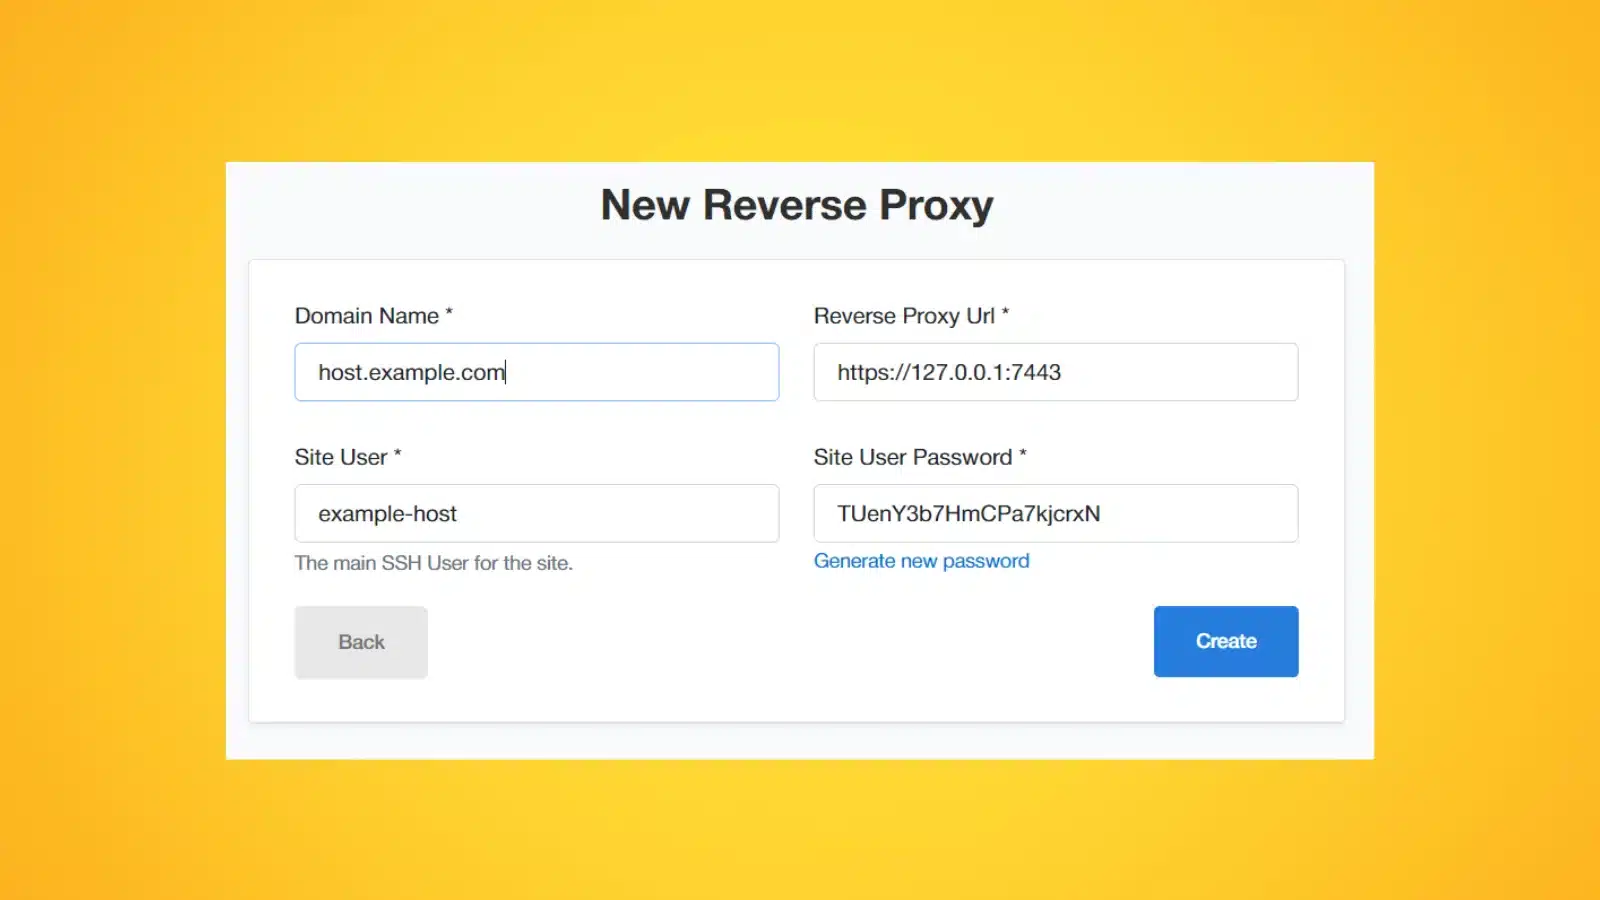
Once you’ve gathered essential ingredients, you’re ready to move on to the further steps but before proceeding the installation of MailCow, as we have to configure Reverse DNS Record in Hostinger hPanel then we firstly login to CloudPanel that you installed with help of guide above to add Site and choose reverse proxy on the hostname that we created. for example host.example.com with Reverse Proxy URL as https://127.0.0.1:7443.

After setting up Reverse proxy, install SSL Certificate from above menu and generate new Let’s Encrypt Certificate
1. Login SSH as root
Now comes the main part of Mail Server Installation for which we created all pathway from start but first of all we need to connect to VPS terminal using SSH which is provided by every Hostinger provider with credentials.
2. Disable PostFix if installed
Most of time by default with CloudPanel on Ubuntu, PostFix is installed which need to be disable for smooth installation process so for that we will verify installation of postfix mail server and if any, then we will delete it on the spot using following command:
systemctl stop postfix && systemctl disable postfix3. Install Docker on Ubuntu
MailCow mail server is the dockerized version containing multiple services required to create an efficient SMTP Mail Server. Here is the command to install Docker with Docker-Compose plugin on your VPS server having Ubuntu Linux installed:
curl -sSL https://get.docker.com/ | CHANNEL=stable sh && apt install docker-compose-plugin4. Fetch MailCow GitHub Repo
MailCow having a huge community that works regularly for improvements and for that you need to fetch latest release from creators.
Install Git on Ubuntu
If you are new to Ubuntu and never installed Git before then, you need to run sudo apt install git inside your terminal to firsly install Git on your machine.
Hoping you have Git installed then execute following commands one-by-one to pull latest Mail Cow release from Github.
cd /opt/mailcow-dockerized
git clone https://github.com/mailcow/mailcow-dockerized
make sure you are in directory /opt/mailcow-dockerized, then run following command in same terminal
./generate_config.sh
During configuration you have to set the Mail server hostname (FQDN), e.g., host.domain.com or mail.domain.com that you earlier configured in PTR record.
4. Setup Ports and Bindings
This step is last, now we are one step behind the completion of our mail server. Change the values for HTTP_PORT, HTTP_BIND, HTTPS_PORT, HTTPS_BIND from mailcow.conf file using following command:
nano /opt/mailcow-dockerized/mailcow.confText editor will appear where you have to change above four variables according to following port numbers:
after changing press Ctrl+O to save files.
Starting Up Mailcow Mail Server
If you have followed along above steps, then Congratulate yourself. Now you only have to start Mailcow dockerize container with help of following command only:
cd /opt/mailcow-dockerized/ && docker compose pull && docker compose up -dConclusion
Installation of the best Mail Server on your VPS with CloudPanel installed on Ubuntu 22.04 or later versions is pretty straightforward. Following this guide step by step, you now have a very reliable and efficient mail server set up, properly configured, and with measures against most security threats. This server will maintain its integrity and performance provided that it is regularly updated and monitored.
We encourage you to go through the whole guide. In case of some issues or if you have questions, please leave a comment. We’re here to help if you need professional assistance—our team will make sure your mail server is set up and running well.
Thank you for following this guide, and happy emailing!


