Haven’t you become puzzled ever about getting the most recent and official Windows 10 from Microsoft download and install it on your system? Don’t worryᅳthis blog post is just for you. Whether you’re a tech guy or a novice user, you get everything all in one place with our complete guide for installation. Either upgrade your Windows from previous releases or refresh your current Windows 10 installation with ease, as we walk you through each step, from downloading the latest Windows to completing the setup on your device. You are ready to transform your Windows 10 into a seamless experience with our detailed steps and useful tips!
It better to Always Keep Your Data Backed Up! Rather to regret later
HashBitStudio
Preparation: Backup Your Data
Before installing or upgrading to Microsoft Windows 10, it’s very important to take backup to prevent any loss later on. Here are some quick and reliable methods of taking backup:
- External Hard-Drive: Connect your external HDD if any, and make a copy of your essential files.
- Cloud Storage: All the services like Google Drive, Dropbox, and One Drive provide the facility of synchronizing the data online. Either way, you may have to pay a Cloud Service provider for membership because the storage space is limited and as a result you will have to purchase a subscription for that if your data is more than the given limit.
- USB Flash Drive: Save smaller files to a USB drive for quick access and easy restoration.
By backing up your data, you can move forward with the Windows 10 installation, knowing your important files are safe.
Method 1: Download using Installation Media
First method of installing Latest Microsoft Windows is by using installation media where you can either upgrade or download the latest windows in our case Windows 10 from official microsoft website. Follow these steps:
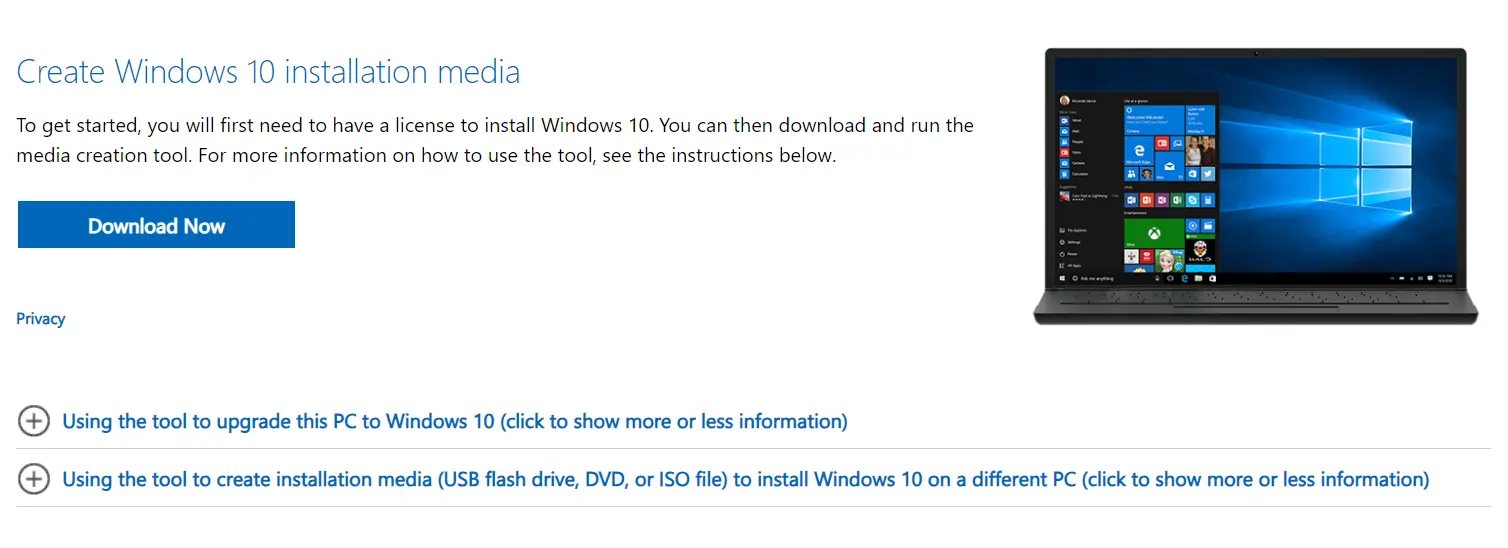
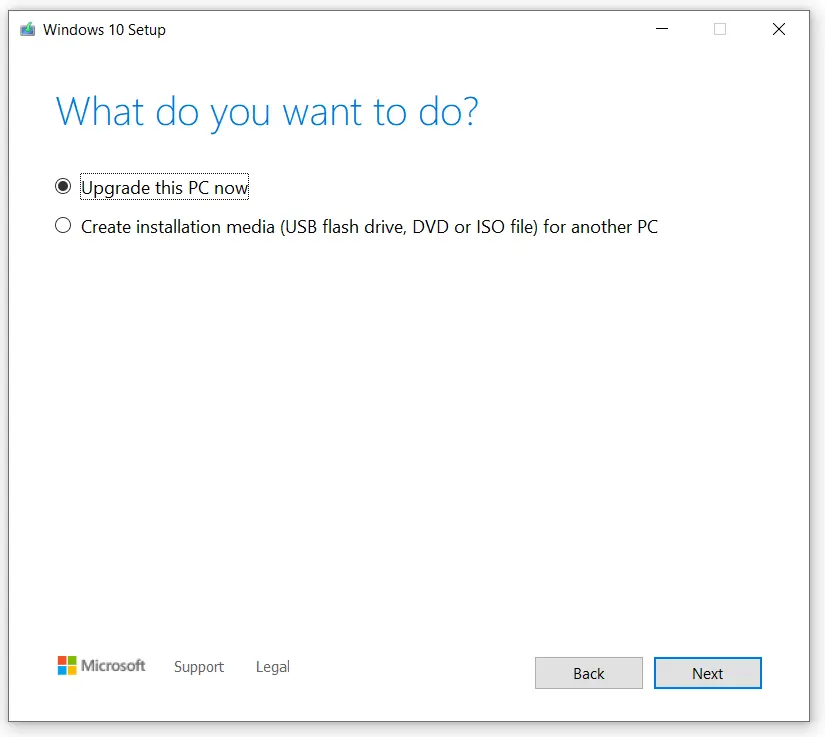
Follow the on-screen instructions to create a bootable USB drive or DVD, this may take few minutes to couple of hours depending on Internet speed.
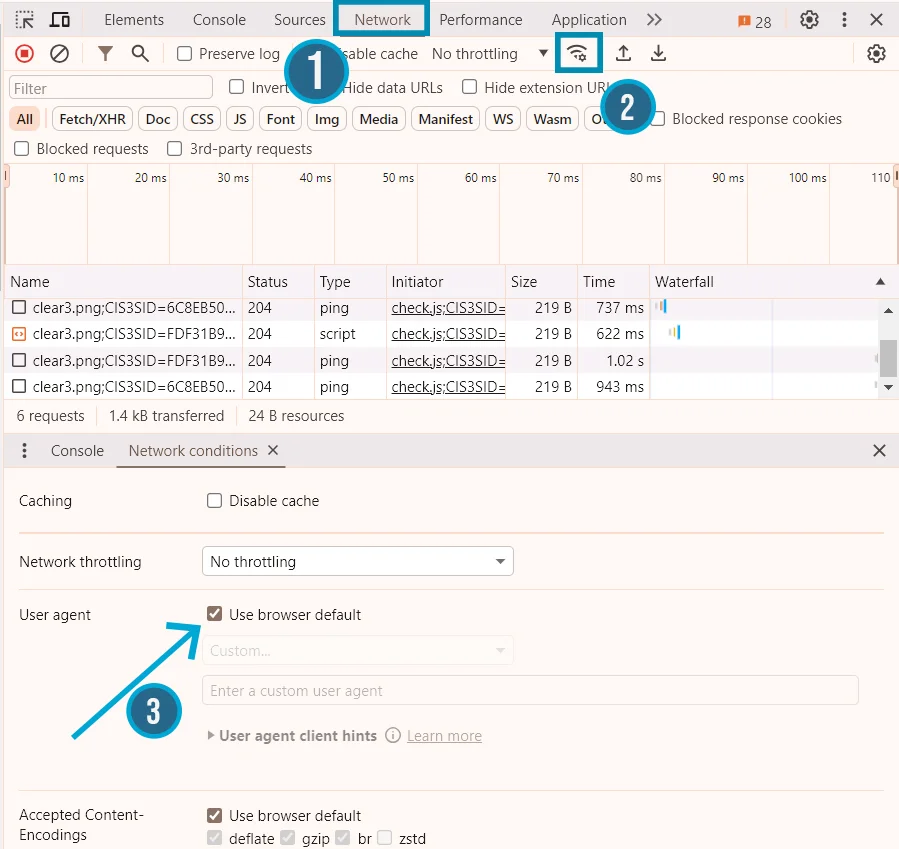
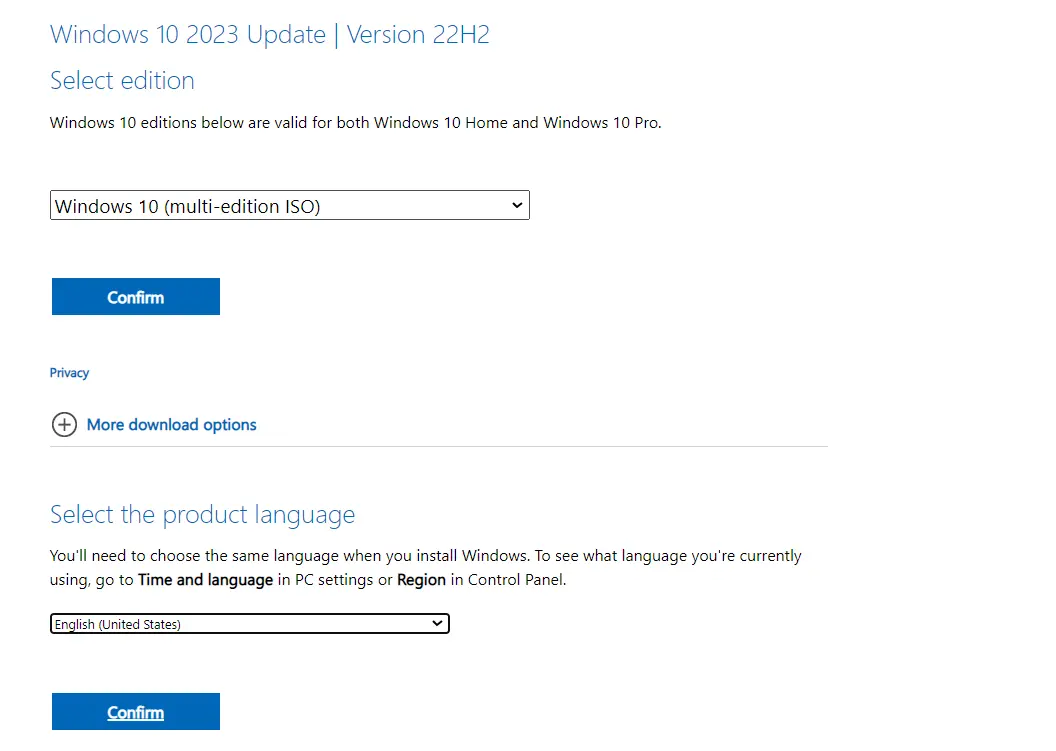
Method 2: Download Windows 10 Official via Direct Method
This second method is my favourite one, why waiting so long rather Downloading an official ISO file from Microsoft’s website. Without further a ado follow along below steps to download latest Microsoft Windows:
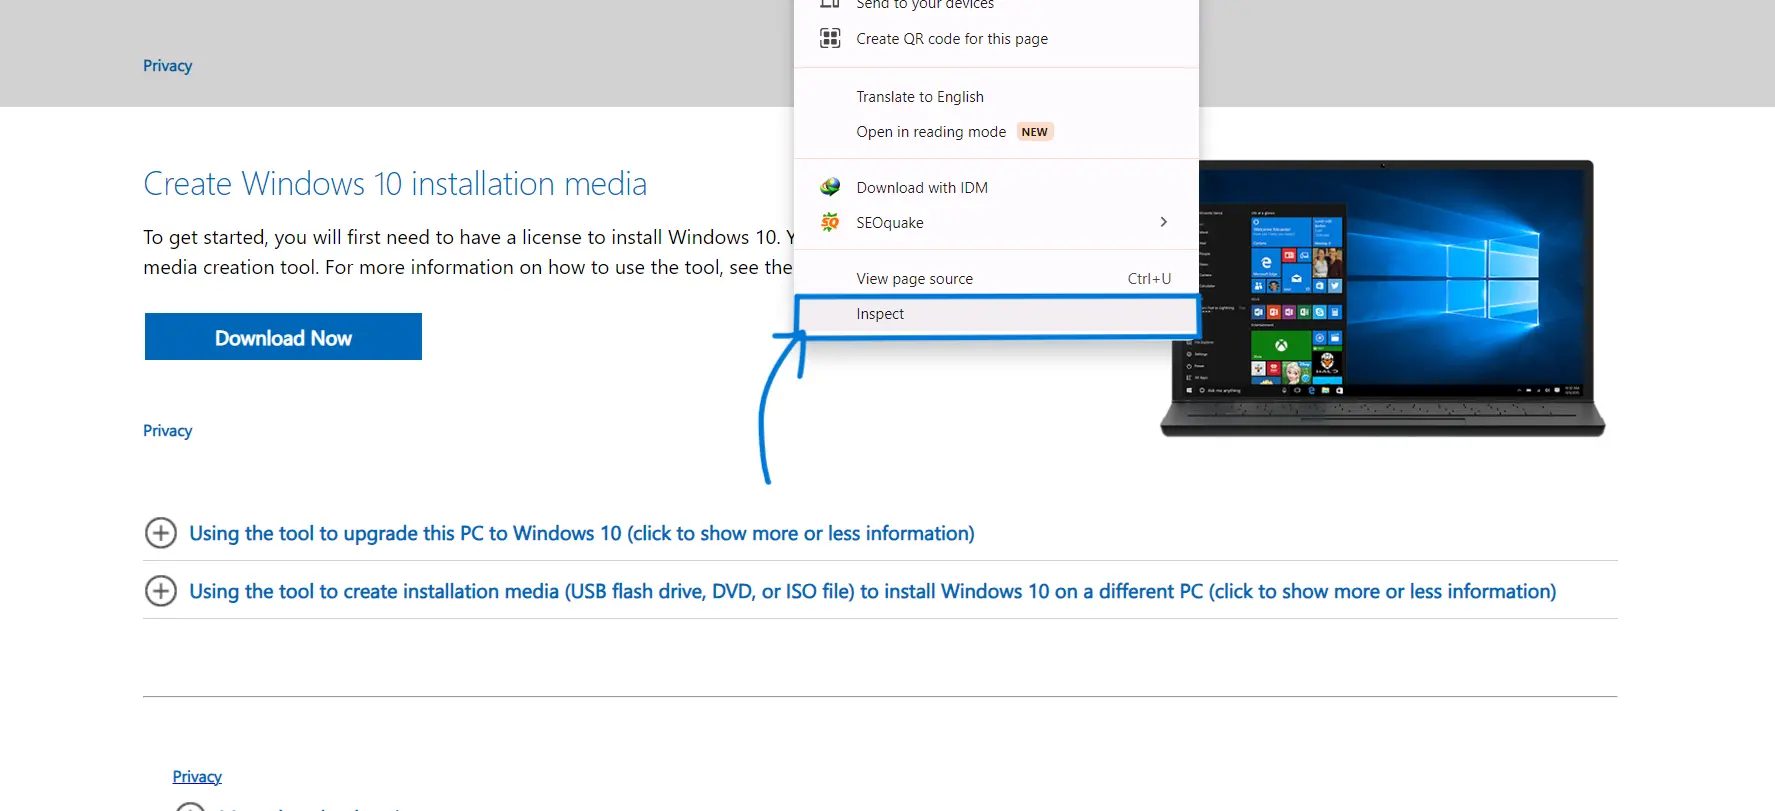
Creating Bootable Windows on USB and Installing
After downloading Windows 10 ISO file, next step is to create a bootable usb drive which will be later on use to install Windows on your system. To install, we need a software named as Rufus.
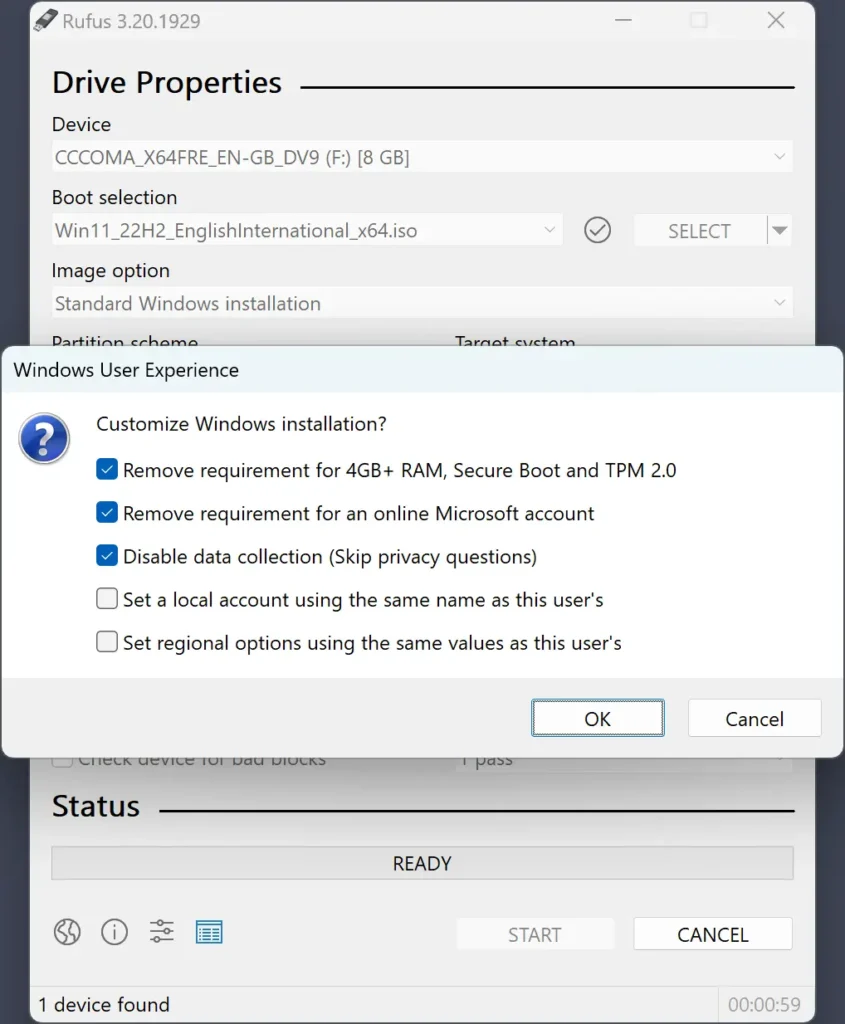
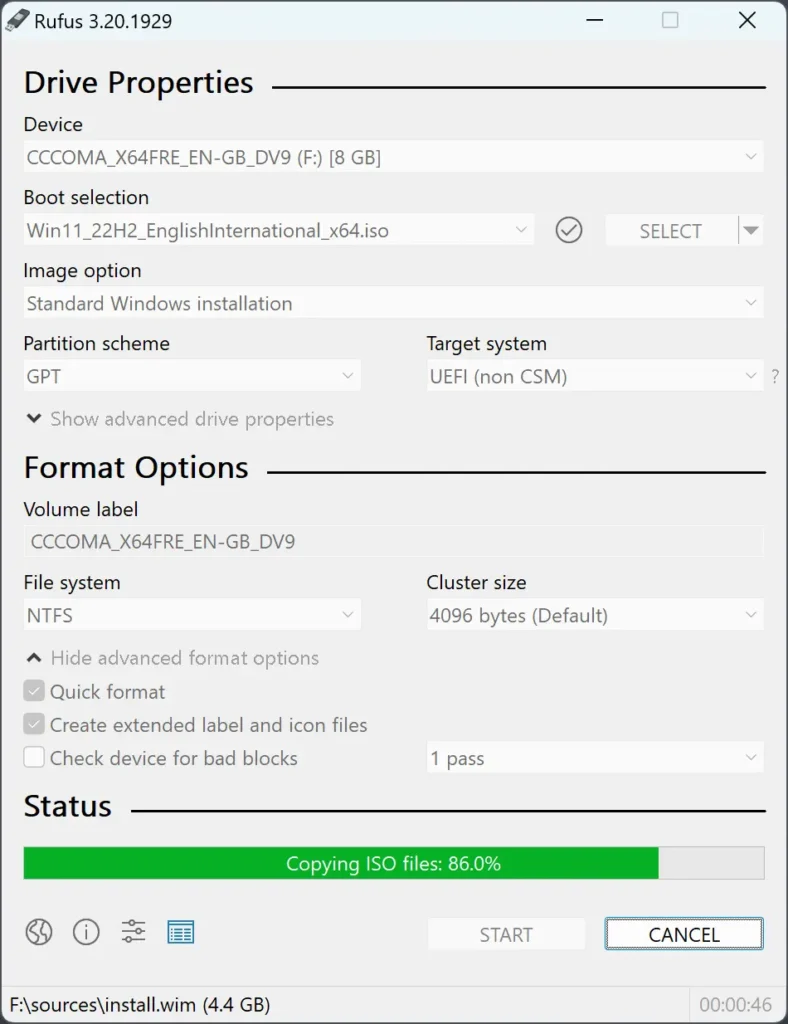
After opening Rufus, you need to connect you USB Drive of atleast 8 GB and make sure there is no data existant on you Drive. Note: Existing Data will be erased from your drive right after creating bootable.
MBR vs GPT Partition Scheme
MBR or Master Boot Record is the older standard which supports drives up to 2TB with a maximum of 4 primary partitions (or 3 primary and 1 extended partition for more). Ideal for legacy systems with BIOS firmware. Where as GPT (GUID Partition Table) is the newer standard that supports massive drives (practically unlimited) and allowing for up to 128 partitions. Works best with UEFI firmware, common on modern systems.
How to Choose between MBR and GPT?
To choose between either of Partition scheme, check your firmware If you are unsure, firstly restart your PC and enter the BIOS/UEFI settings (usually by pressing Del, Esc, or F2, F9, F12 during boot). Look for “UEFI mode” or a similar option. If present, choose GPT. In short, for a new Windows 10 installation on a modern system, MBR might work, but GPT is the future-proof option.
How to Install Windows from Bootable Drive?
Now major task of downloading and creating bootable drive is finished and now its time for the task for which we did all of the above process. So let’s dive into the steps that you will be following to install Windows 10:
Depending on how fast your computer is, it might take a while for the installation to finish. After it does finish installing, your system will reboot itself and then bring up the new Windows 10 desktop.


